Showing posts with label makeup. Show all posts

Tuesday, November 18, 2014

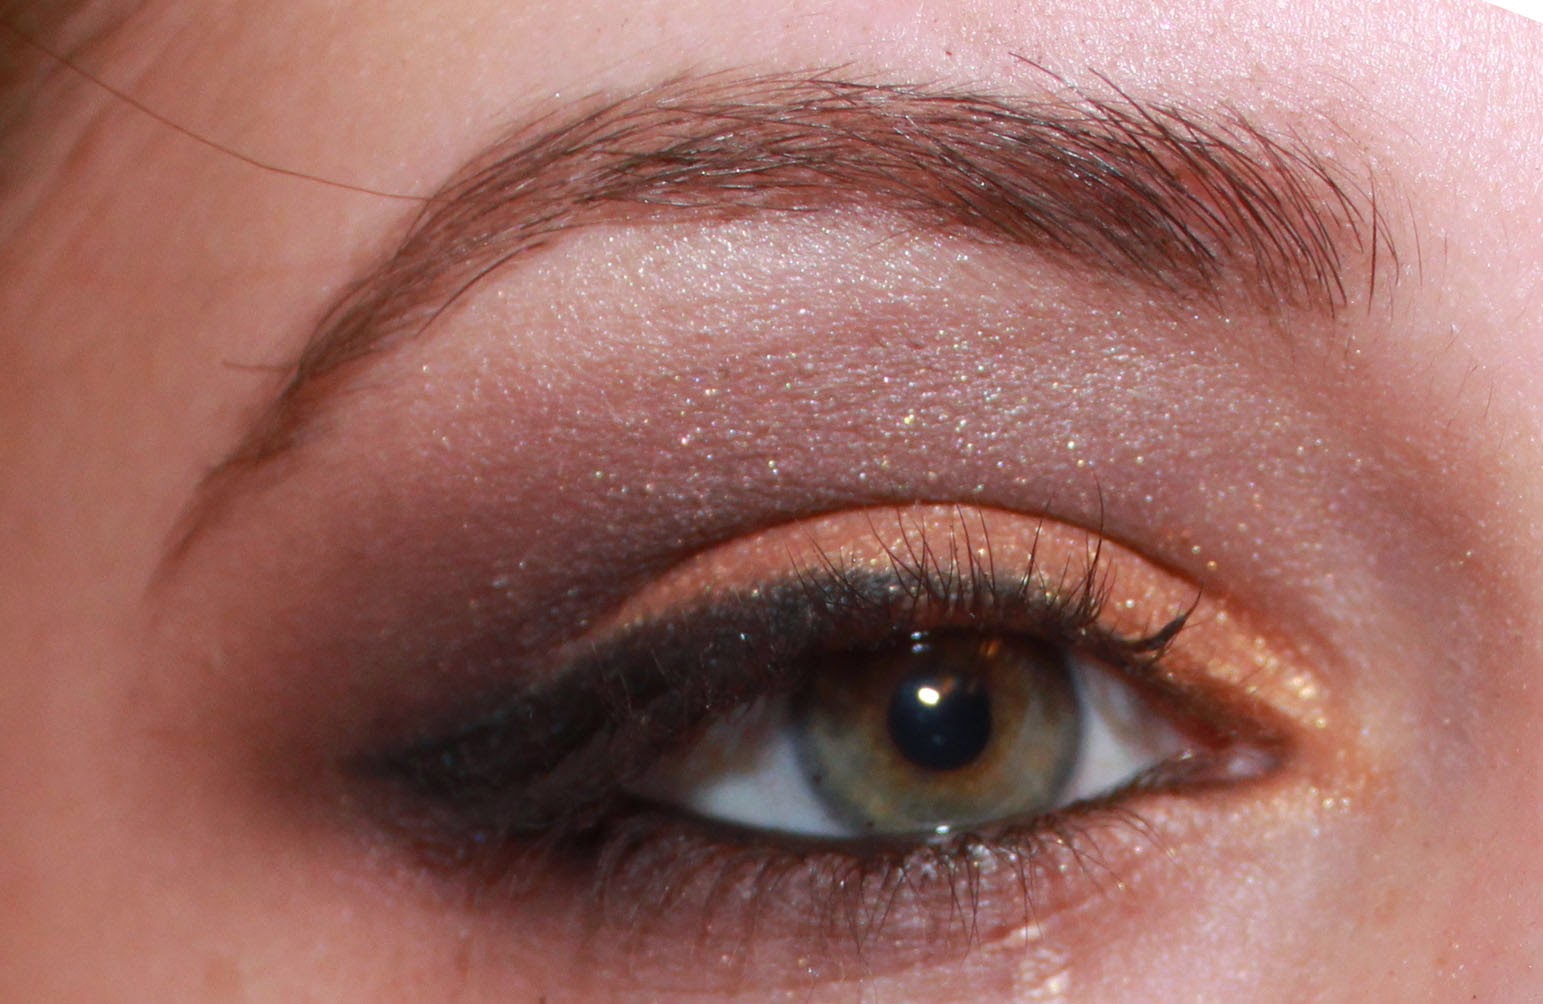
How to.. Sultry eyemakeup

Who doesn't love a sultry and sexy makeup look?

Here are a few steps on how to achieve this look!
The products I used are Revlon photo-ready eye shadow palette in graffiti and tarte bon voyage palette.


We start of with a fresh clean base, I applied my Urban decay primer and then applied the gold copper shadow on my lid from inner to outer corner.


After that I applied a transition shade. What is a transition shade you might ask? A transition shade is a soft brown color, which is applied to the crease and when you apply the darker shade it wont look as harsh.
Blend, blend, blend!!


  Now I applied a Deep plum shade, on the tarte bon voyage palette, the shade on the upper right corner. On my outer corner in a sideways v shape, I went along the lid and up and over the crease
Now start blending in little circles and just blend, blend, blend!!! To the inner and outer corners of your eye, Make sure you don't apply to much eye-shadow before blending otherwise you will struggle with blending. Remember, its better to start of  with less color and build up then apply to much and struggle with your eyes. It is easier to build up, less is more sometimes.
You can see how the deep plum shade blends into the transition shade very effortlessly,  giving it a softer look.

Now apply the same exact color on your lashes towards the center. Make sure to blend it out creating a soft and smokey effect underneath your eyes. 


Pretty simple right? I lined my eyes with Nars "Longer  Then Life Eyeliner". I decided to go with a wing liner then lining my water line. Then taking my MAC "Shroom" and adding to my brow bone.
After you have applied your eyeliner, apply some mascara on your top and bottom lashes. 
Then I added some false lashes from Ardell. i forgot the style number name.


I decided to blend out the edge of the wing for a little bit of depth and not having so much harshness for this look.
After you are finshed apply your foundation and under eye concealer and clean up under your eye if you have fall out. blend in the under eye concealer with the color on bottom of your eye.
And the eye look is complete. I finished it off with some Dior Blush in 763 Corail and  Nude toned Gloss from Revlon in the color Bellini. 


Monday, October 20, 2014

Milani Lipstick Review


Milani is a well known company and has been out for more then a decade, or since I can remember. This lipstick I am reviewing for you guys has been the latest craze and it is highly reviewed by a lot of people. I purchased it in my local Walgreens for $3.79. This lipstick is Cabaret Blend, a cool toned red lipstick, when in taken a photo with flash you can see it really looks a lot different then when it is in natural lighting..When you first open up the lipstick you can smell a sugary candy sent. Which kind of reminds me of the 99 cent lipsticks I used to purchase as a child. The color is gorgeous but I didn't like it when I applied it was very patchy.....One little problem! It bleeds! ah I know, for such an amazing price you think you were getting a great steal but not really. Here is a picture.  Unless I put lip liner on it does bleed threw the crack into my face! It leaves a stain for quite a while which is great if you dont want such a dark look but love the color, just blot the lipstick on a piece of tissue or napkin then you will have a nice burgundy stain on your lips. Overall I do love the pigmentation and the shine it gives but not how it can bleed so easily. I did test it out when my lips were covered in foundation to give it a fresh base and it still bleed. The only time it didnt bleed as much is when I used lipliner with it but it did later on... Sad to say I won't be purchasing another lipstick from this company, unless they formulate it better.


I had waited about 15 minutes and you can see it already started to bleed on the bottom. (Excuse my peach fuzz!) And the lipstick seats deep into the crevasses in my lips.


And this is the final result after I had kissed my son, drank my coffee and etc... It left a deep stain which I love but it isn't such an apealing look. Look at my bottom lip!


Monday, September 8, 2014

Real Techniques Starter Set

Real Techniques Starter Set Review! 

Real Techniques has been out for a couple of years already and I love this company. They genuinely have great products for half the cost of higher end brands. I bought Real Technique Starter Brush Set in my local Walgreens and you can find this on amazon if your local drugstore doesn't carry this particular set. 


 This kit comes with 5 brushes for the eyes, all your basic brushes for the eyes. It comes with a little stand up pouch, this is great for traveling or on the go if your running late. I get asked a lot what's a good brush set for beginners? Well here it is, this set comes with 5 brushes.  
  1. Deluxe Crease Brush,  
  2. Base Shadow Brush,  
  3. Accent Brush,  
  4. Pixel Point Eyeliner  
  5. Brush, Brow Brush. 
The great part about these brushes are they really don't fray. The quality is amazing, for drugstore price. I am can't say this enough, if you are starting out and are confused with which brushes you need first, get this set, or any real technique set!


I love all the brushes, except the Deluxe Crease brush, I don't use it for my crease but instead to blend out my concealer and corrector underneath my eyes and around my face. I will let you in on a little secret, there are no rule book for how to use certain brushes, the great part about beauty is that you make your own rules. So just because something might say crease brush, I don't use it on my crease all the time, I will use maybe to blend out small blemish or highlight. You get my point, right?


The Base Shadow brush is supposed to be used for applying the eye shadow on the lid, but I don't use it for that. I use it for blending out the shadow in my crease. 


The accent brush is perfect for the under eye, to apply detailed shadowing. I used to smudge my eyeliner under my eye and one top for that nice Smokey look. You can also use it to apply a soft brown as an eyeliner if you are not a fan of the blunt eyeliner look.


This pixel point eyeliner brush is my new favorite eyeliner brush! 
It is fine and very precise, I can really get that perfect liner wing tip.


This is a really great brow brush, perfect for filling in the brows or even using it as an eyeliner brush. 


This Real Technique Brush Starter Kit retails for $13.99. When I originally bought it the retail price was $17.99 and now the price has dropped, so here is your chance to buy it for a lower price. 
Let me know whats your starting makeup brushes?


Favorites